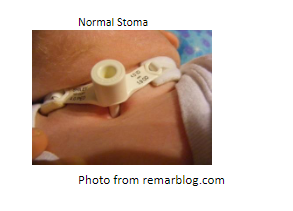
Cleaning
Supplies Needed:
1. Water (sterile in hospital and tap at home)
2. Dressing (i.e. split gauze, Mepilex Ag, Optifoam, etc.)
3. Cotton tip applicators (approximately 8; 4 wet, 4 dry)
4. Gauze (approximately 4: 2 wet, 2 dry)
5. Clean pre-sized Velcro trach collar and circuit ties
6. Shoulder roll
7. Ambu Bag, suction, and back up trach tubes
Steps for Changing the Trach
1. Position the patient with a shoulder roll.
2. Remove the gauze dressing and assess the skin for redness, swelling, or granulation tissue.
3. While keeping the tracheostomy tube secure either by hand or Velcro tie, take a cotton-tip applicator from the water, place it at the edge of the peri-stomal area and cleanse AWAY from the stoma.
4. Repeat in all four directions, using a clean wet applicator each time.
5. Never insert a used applicator into the water.
6. Dry the peristomal area with clean, dry applicators, wiping AWAY from the stoma.
7. While holding the trach in place, remove the Velcro collar and cleanse each side of the neck with a wet gauze from stoma outward then use dry gauze from stoma going outward.
8. Nystatin powder may be applied to the trach collar if prescribed (never apply powder to stoma)
9. Attach the Velcro trach collar.
10. Apply stoma dressing (do not use instruments to apply dressing as it can cause trauma to the neck).
11. Ensure that the trach collar is secured by checking with ONE FINGER WIDTH between the patients collar and neck at the back of the neck.
12. Secure vent circuit with circuit tie and remove neck roll.

